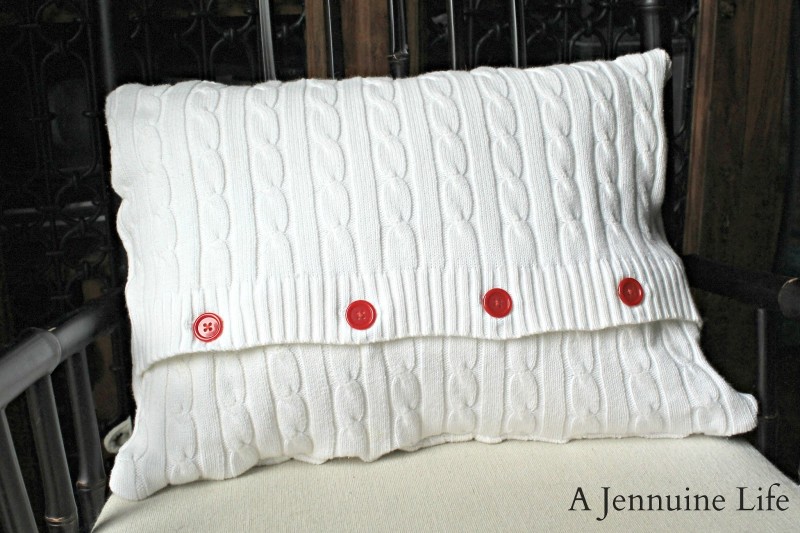
I’d always pretty much considered Valentine’s Day an adult holiday until I had kids. Â Now I appreciate the sweetness and fun of a day (or month!) to immerse ourselves in everything hearts & love & affection. Â I’ve had this plan to upcycle an old sleeveless sweater into a pillow and today I’m sharing what I’ve transformed it into – a “love” reverse applique sweater pillow.
This is a pretty easy project, and I’ll share a couple of ways you could make it even quicker!
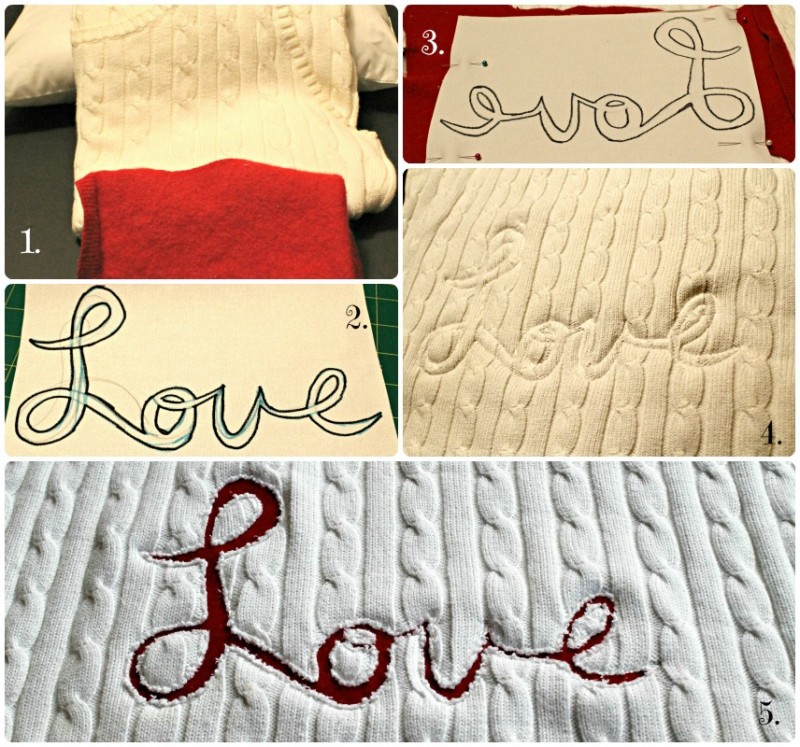
1. Â Gather supplies: Â I recently bought a 12 x 16 lumbar pillow at JoAnn’s during a nice sale and used a coupon for an additional 25% off. Â The sweater is a white cable knit sleeveless sweater that I’ve had in my “to be refashioned/upcycled” drawer since it got a stain on the back I couldn’t get out. Â Some red felted wool I had (yet another project with lovely felt from my Package Pal Ellen!).
2. Â Sketch out your design. Â I used a scrap of duck cloth and this will also serve as the stabilizer for the applique. Â You could also print out a font you like, but I wanted this to be in my handwriting. Â Hubby Dave even commented that he liked that it was my writing! Â Go over the final design with a sharpie or dark marker so the next step will be easier.
3. Â Trace the design in reverse. Â Make a sandwich with the sweater right side down, then the felt, and finally the design with reversed side up. Â Pin in place. Â You could iron some interfacing between the felt and the design here as well to further stabilize your stitching.
4. Â Working slowly from the backside where the design is showing, stitch around the lines of the design.
5. Â Cut away the sweater close to the lines of the stitching. Â You could go back over with a zig-zag or other stitch, but I liked the look of the rough edges.
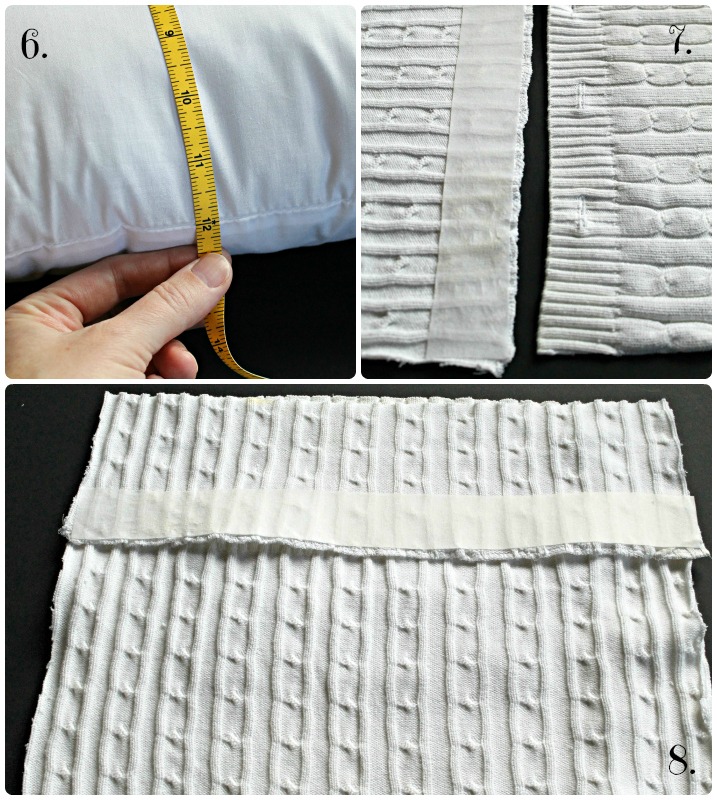
6. Â Measure the pillow – just want to double check the measurements.
7. Â Prepare the back. Â I decided to make a button closure for the back and used the bottom edge for the buttonholes. Â Sew buttonholes at even intervals. Â For the side with the buttons I finished the cut edge using my serger, but you could zig-zag or turn the edges just as easily. Â Iron a strip of medium weight interfacing to stabilize the edge and support the stitching for the buttons. Â Make sure the pieces are cut to overlap on the back – I made mine overlap 1.5″; the width of the ribbed edge of the sweater. Â Or if you want to make it easier, use the front of a button down shirt and skip buttonholes and the rest!
9. Â Turn right side out and add buttons. Â Stuff the pillow form in, button up and enjoy!


This turned out so nicely. The pillow looks amazing. I like the upcycled nature of the project.
I love your pillow and wish I was brave enough to try to make it! Found you via Sundae Scoop Link at I Heart Nap Time.
Hope you are able to stop by my blog sometime.
Julia from
itsalwaysruetten.blogspot.com
You are very talented it looks so professional. Great work!
Christia
I love how this came out!! Stopping by from Sumo’s Sweet Stuff linky party and your newest follower. Here is what I shared this week: http://craftybrooklynarmywife.blogspot.ca/2013/01/fun-fur-boa-scarf.html
This is my favorite take on the sweater pillow yet! I love what you did…:)
Upcycle projects are so much fun and I love the reverse applique technique. It gives it character. If you get a chance come link up at my Pin Party.
http://sarahdawndesigns.blogspot.com/
I love it! The contrast with the red and white with the sweater is so cute! I found you from Sumo’s sweet stuff.
Oh wow this is GORGEOUS!!!!! I love everything about it! I love the sweater, the “Love” font, and the red buttons, too! Beautiful! I’m pinning this!!!!
I love that this is made from a sweater! So cool! Pinning this!!
Pinning this! Found you via take a look tuesday….. this looks really nice.
This is perfect for Valentine’s Day! Love it!Thanks so much for sharing the great tutorial! Would love to have you visit me sometime.
Have a fabulous day!
Hugs from Portugal,
Ana Love Craft
http://www.lovecraft2012.blogspot.com
This is adorable, thanks for the idea!
Lindsey @ http://the-dailyme.blogspot.com